Did you know that a running toilet can increase your water bill by hundreds of dollars in just one week? Never fear, Twin is here! Welcome to “How-To Fridays” where the construction experts at Twin walk you through a seemingly difficult task and empower you to accomplish them on your own.
A running toilet may be an easy fix if you know how to diagnose the problem. First, let’s start with the basics. Most toilets consist of two parts, a bowl and a tank.
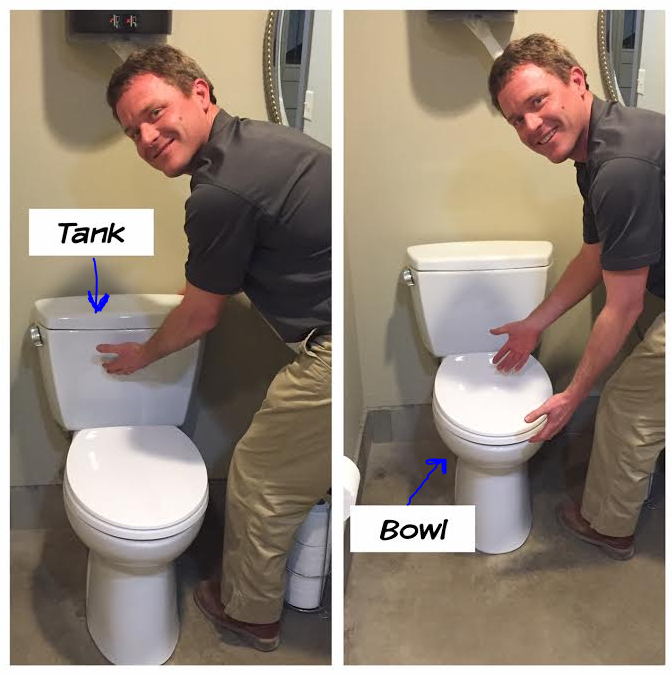
The tank holds the reservoir of water to flush. Inside the tank are several parts.
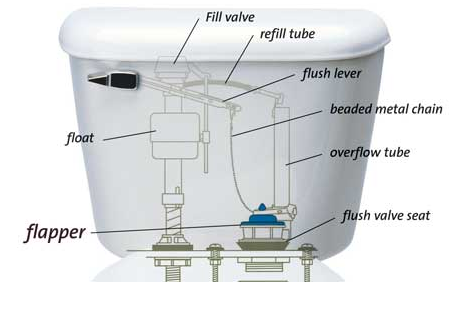
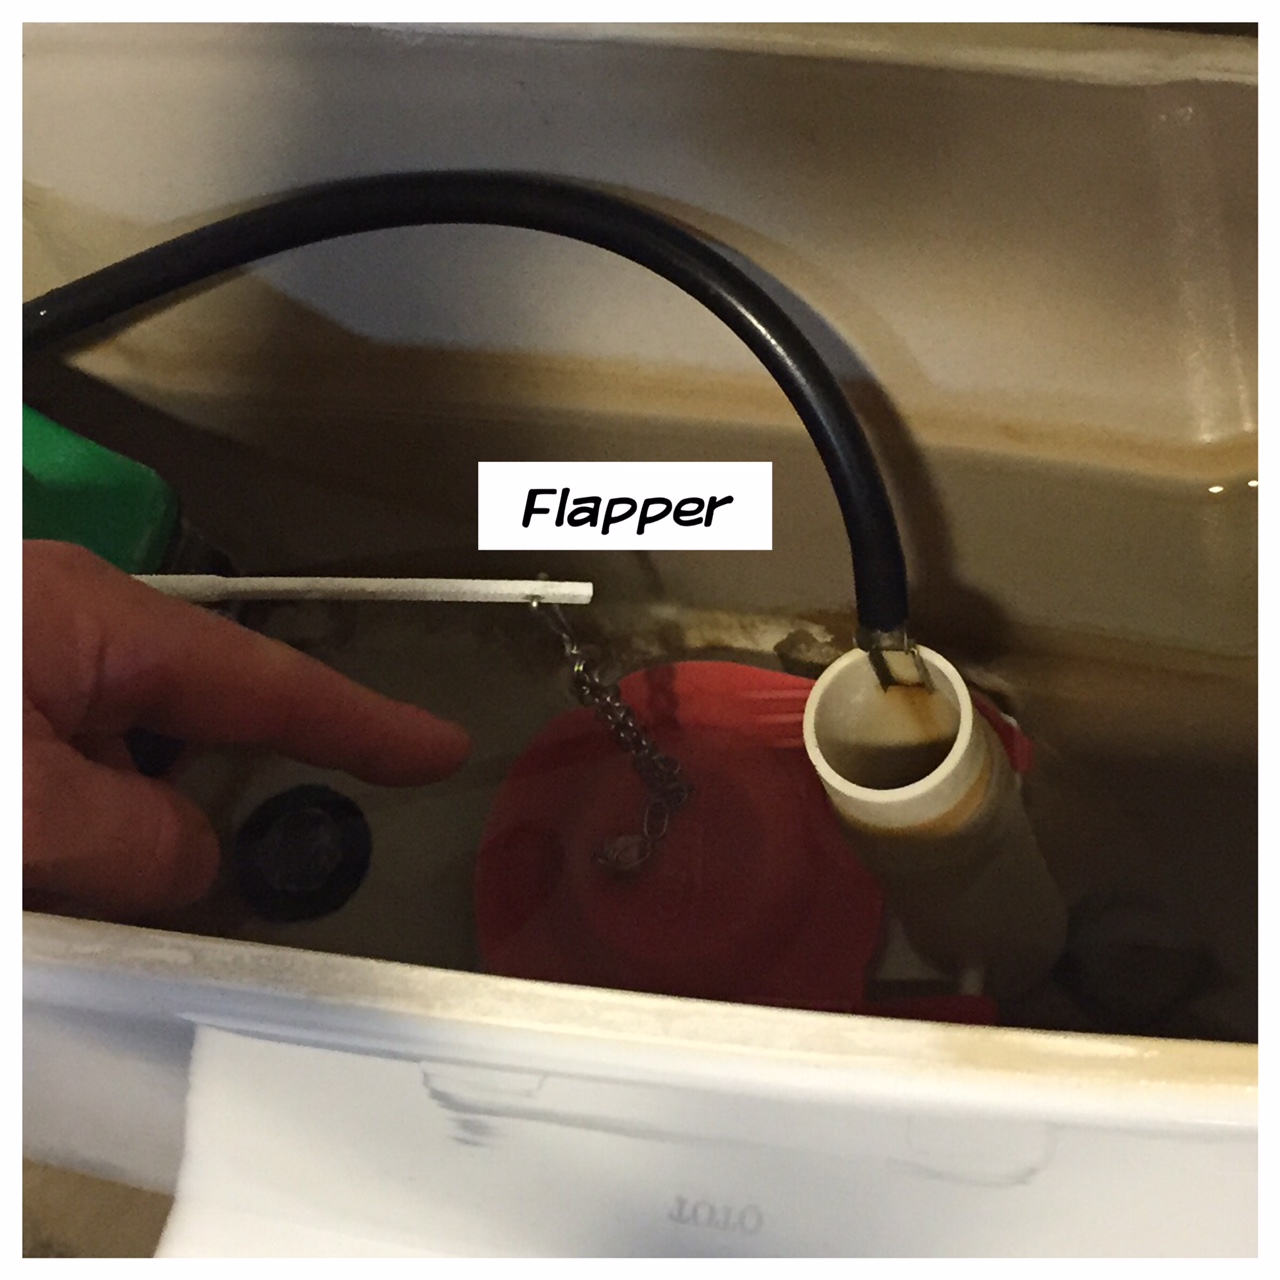
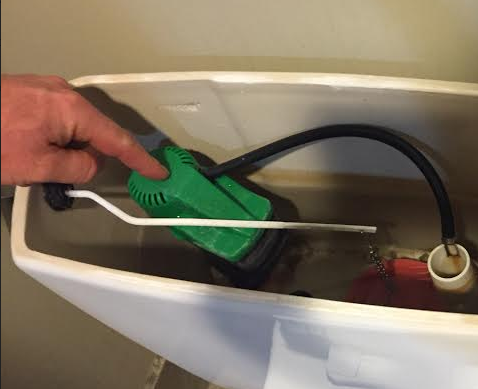
The fill valve “fills up” the bowl to a certain level. There are many different types of fill valves on the market, but they are almost all universal in fit. Meaning, you do not have to purchase an identical fill valve for replacement. The flapper is the piece of plastic that seals the hole in the bottom center of the tank. As you flush the toilet, the flapper will lift, allowing water to exit to the bowl. There are two sizes of flappers, standard and oversized. Match the size of the flapper for replacement.
Now that you understand the basics, let’s get started.
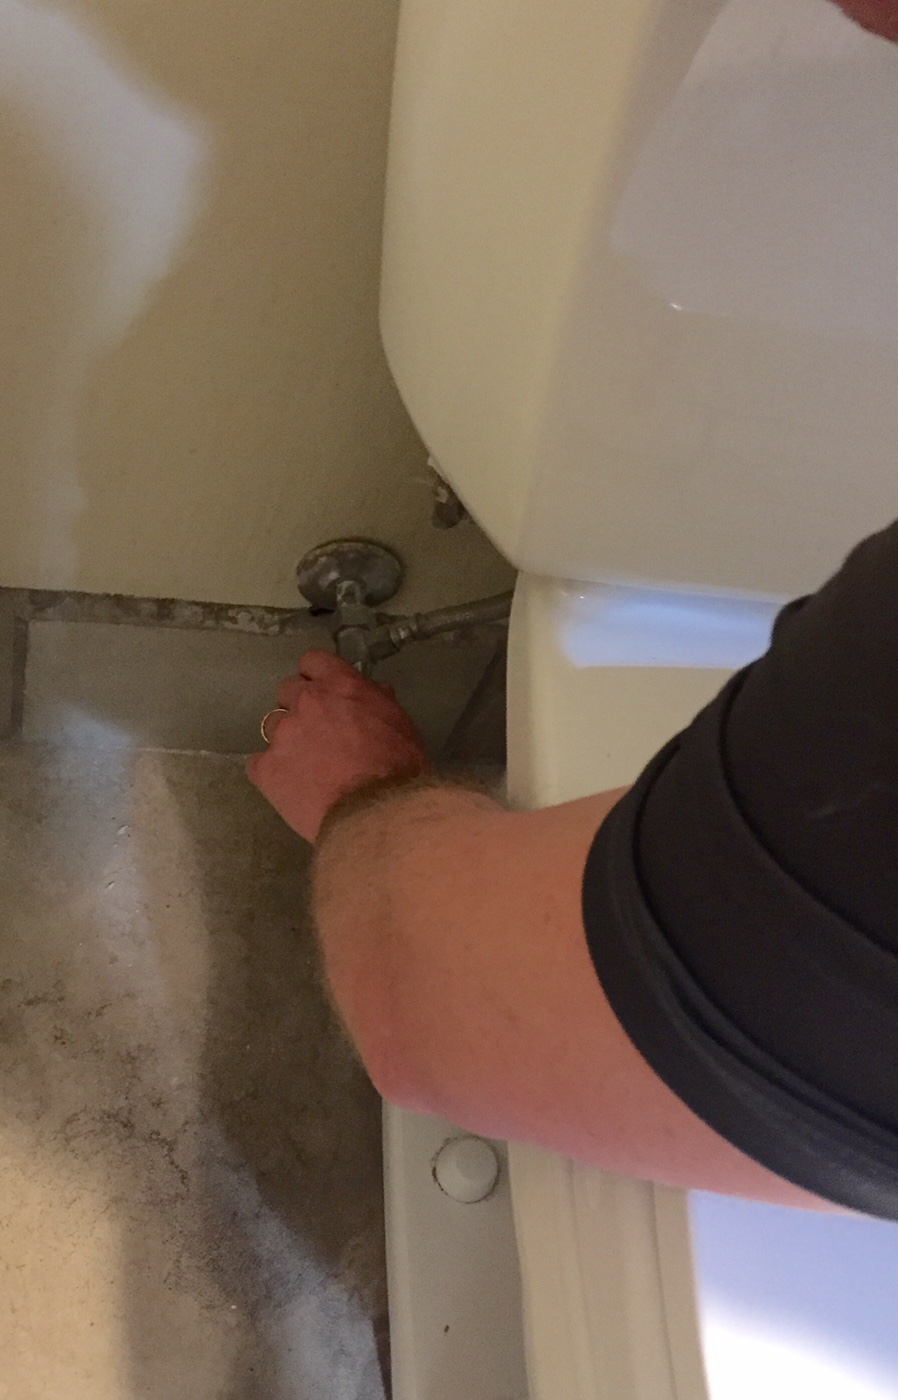
Step 1: Turn off the water supply to the toilet.
Step 2: Remove the lid to the tank and note the height of the water inside. Wait one hour and note if the water level decreases or stays the same. If it decreases, the flapper needs replacing. If it stays the same, the fill valve needs replacing.
Step 3: Purchase required parts.
Step 4 / Flapper: To replace a flapper, simply remove the old one and clip on the new one. Hook the chain back to the flush lever. You may need to shorten the chain by removing links or tying the chain in knots so that the lever will pull the flapper up.
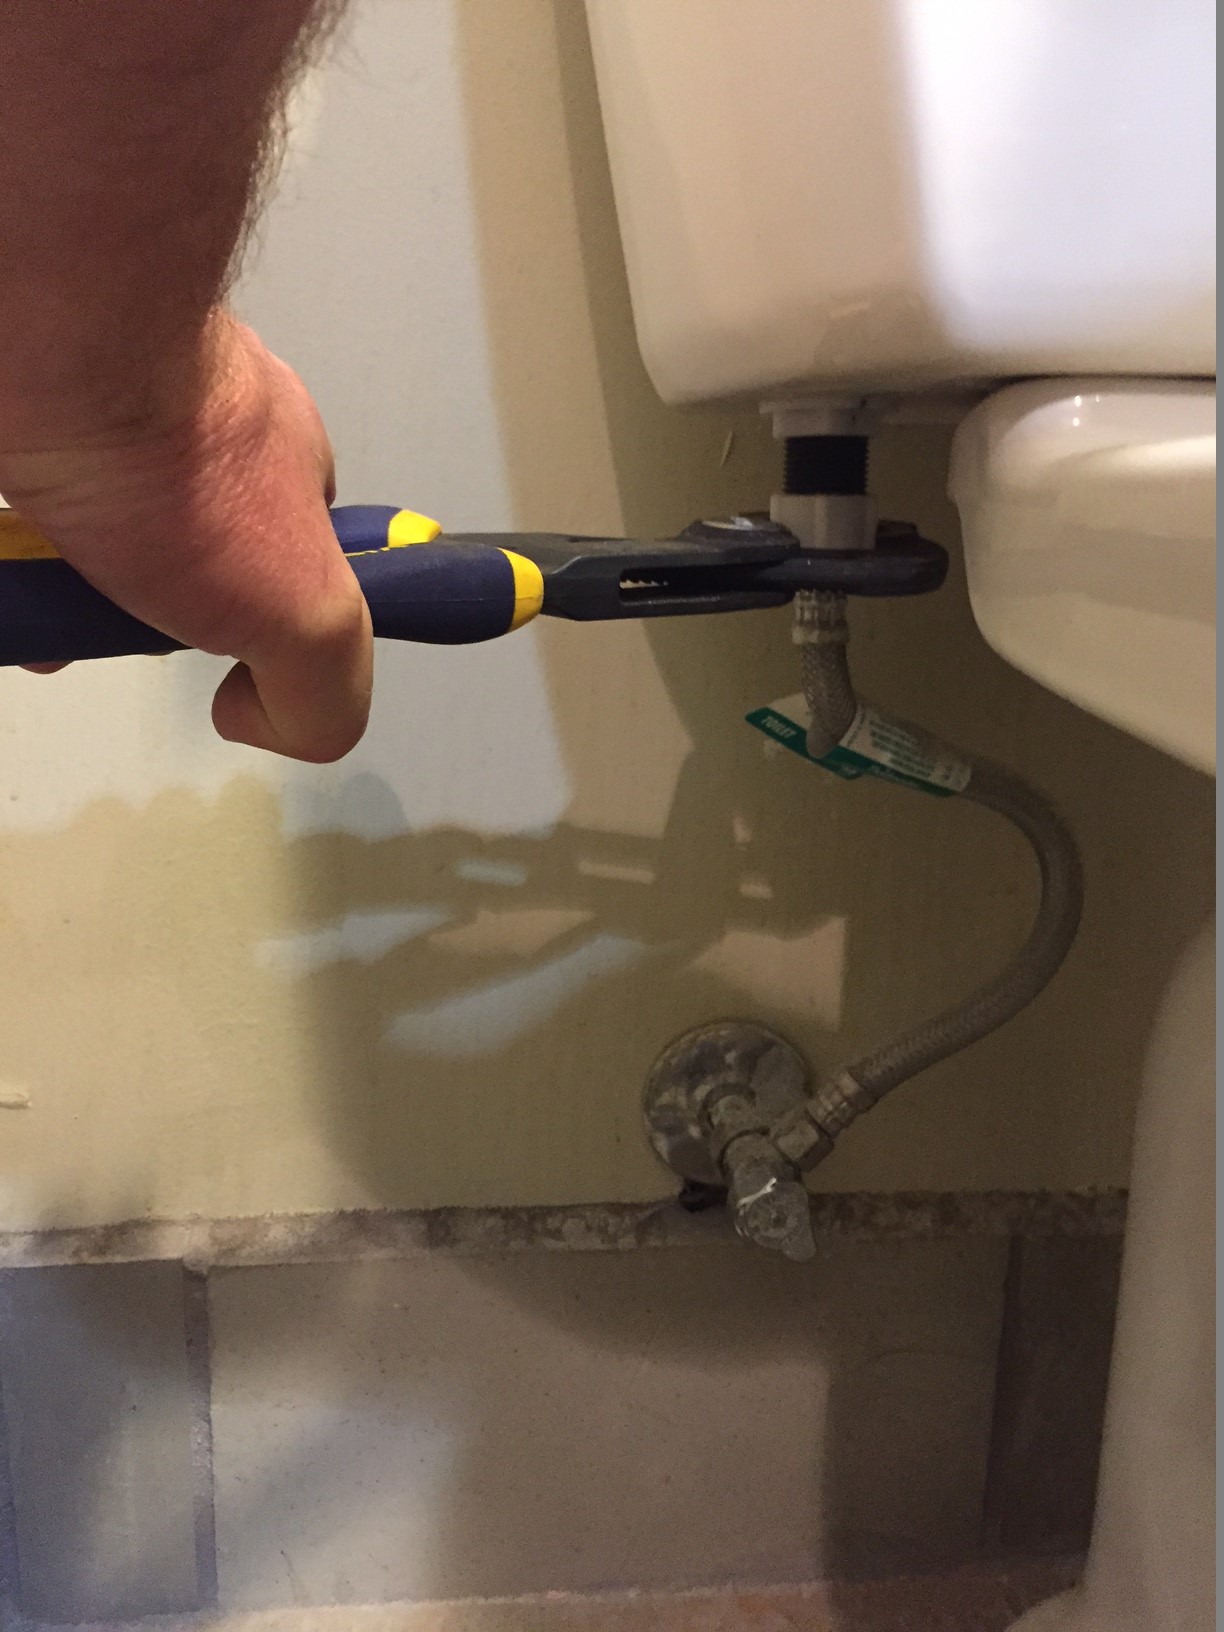
Step 4 / Fill Valve: Replacing the fill valve is a little more complicated. First, use pliers and unscrew the connection where the supply line meets the toilet. Unscrew the nut underneath the toilet. Remember, the water supply is already turned off! Have a bucket and towel on hand in case there is still water remaining in the tank.
Step 5 / Fill Valve: Remove the old fill valve and install the new one. The height of the new fill valve may need to be adjusted to store more water (make sure you read your fill valve manual to find out how to adjust the water in the tank) . The more water you allow to be stored in the tank the better the toilet will flush. Replace the supply line and turn on the water supply.
Step 6: Flush. Sit back and admire your handiwork!